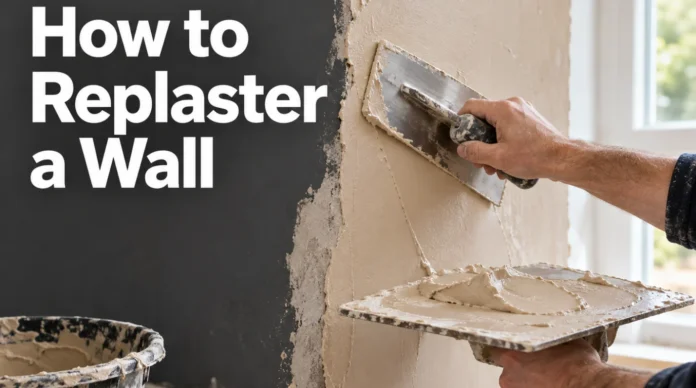
Learning how to replaster a wall can save a tired room from cracks, loose plaster, and uneven finishes. The job requires careful preparation, clean tools, and good timing rather than expensive equipment. You also need to identify whether the wall needs patching, skimming, or complete replastering before starting.
Replastering starts by removing unstable material and repairing the sound base beneath it. You then control surface suction, mix fresh plaster, and apply thin coats while each layer remains workable. Finish by flattening and trowelling the surface, then let it dry naturally before decorating.
| Question | Practical UK answer |
|---|---|
| Best for | Loose, damaged, cracked, or badly uneven plaster |
| DIY difficulty | Moderate to difficult |
| Main tools | Hawk, plastering trowel, bucket, mixer, brush, scraper |
| Typical finish | Two thin finishing coats over a suitable prepared background |
| Drying | Usually several days, depending on conditions and thickness |
| Decorating | Wait until the plaster is uniformly dry. |
| Professional help | Sensible for large walls, ceilings, damp damage, or unstable backgrounds |
Should You Replaster, Skim, or Repair the Wall?
Not every damaged wall needs stripping and rebuilding. Small holes and isolated cracks can often be repaired with filler or suitable patching plaster. A basically sound but uneven surface may only need a fresh skim coat. Full replastering makes more sense when large areas sound hollow, crumble, bulge, or detach from the substrate.
Tapping across the surface can help you locate loose sections before starting. New plaster should never be expected to stabilize material that is already failing beneath it. Check moisture problems before covering anything with fresh material. Staining, mold, persistent dampness, or recurring blown plaster can indicate an unresolved water problem. Repairing the leak or moisture source first reduces the chance of the new finish failing.
British Gypsum advises removing loose, flaking, and unstable material before skimming damaged plasterboard. Dust and weak material should also be removed before applying a bonding treatment. See its preparation guidance for damaged plasterboard.
What You Need Before Starting
Good plastering depends heavily on having clean equipment ready before the mix begins setting. A stainless steel trowel and plasterer’s hawk handle most of the application work. A separate clean bucket also prevents old plaster from contaminating a fresh batch.
You will usually need the following items.
- Plastering trowel.
- Plasterer’s hawk.
- Large clean mixing bucket.
- Bucket trowel.
- Mixing paddle and suitable drill.
- Scraper.
- Paintbrush or plastering brush.
- Spray bottle.
- Dust sheets.
- Joint or scrim tape where required.
- Suitable bonding agent or primer.
- Appropriate finishing plaster.
- Clean water.
- Safety goggles.
- Gloves.
- Suitable dust protection.
Choose the plaster for the background rather than buying the first bag available. British Gypsum describes Thistle MultiFinish as a finishing plaster for common plaster and plasterboard backgrounds. Its instructions specify a 2mm application thickness, so always follow the exact guidance for the product you use. Check the manufacturer’s plaster specification before mixing.
Plasterboard also needs secure fixings before any decorative finish goes on. Loose boards can move and encourage cracking through a new skim. DecoHome’s UK plasterboard screws guide explains common fixing choices for timber and metal framing.
How to Replaster a Wall in 8 Steps
1. Protect the Room and Make the Area Safe
Move furniture away and cover the floor with suitable protective sheets. Remove wall fittings that prevent clean access to the working area. Keep plaster, water, and tools away from live electrical parts. Turn off electricity where the work exposes or closely surrounds sockets and switches. Electrical alterations can fall under additional building requirements, particularly in bathrooms and other special locations.
Check current UK building regulations guidance when the project extends beyond ordinary surface repair.
2. Remove Loose Plaster and Prepare the Background
Scrape away anything loose, hollow, flaking, or poorly bonded. Continue until the remaining edges and background feel firm under light pressure. Brush or vacuum away dust because a dirty surface weakens adhesion. Avoid unnecessary dry sanding where another preparation method will work. HSE guidance warns that sanding plasterboard joints can create high levels of gypsum dust. Extraction and sensible dust controls reduce airborne material during dusty preparation.
3. Repair Deep Damage Before Skimming
A finishing plaster should not become a deep-hole filler. Fill substantial hollows using a product designed for that depth and background. Let repairs reach the required condition before applying the finish coat. Use scrim tape where cracks or board joints require reinforcement. Secure loose plasterboard before continuing because surface plaster cannot correct movement beneath it. Aim to create a stable and reasonably even base before mixing finishing plaster.
4. Control Suction and Prime the Surface
Different walls absorb moisture at different rates. An excessively absorbent background can pull water from fresh plaster before you can finish it. A smooth or low-suction surface may need an added mechanical key for secure adhesion. Use the bonding or priming system recommended for your chosen plaster and background. PVA is common in DIY guidance, but it isn’t suitable for every surface.
Proprietary grit primers and bonding agents may be specified instead. Apply the product evenly and follow its drying instructions. British Gypsum specifies its Thistle Bond-it system for certain damaged plasterboard preparations. The company advises a continuous keyed coating before a trial plaster application.
5. Mix Fresh Plaster
Start with a spotless bucket and clean water. Add the dry plaster to the water rather than pouring water into a pile of powder. Follow the manufacturer’s stated quantities because products can have different mixing requirements. Mix until the plaster has an even, workable consistency, with no dry pockets or lumps. Only prepare an amount you can apply during its useful working period.
Never try to revive setting plaster by adding more water later. Clean the paddle, bucket edges, and tools promptly after mixing. Hardened fragments can fall into the next batch and drag across the wall. Small contamination problems can create surprisingly visible lines in the finished surface.
6. Apply the First Coat
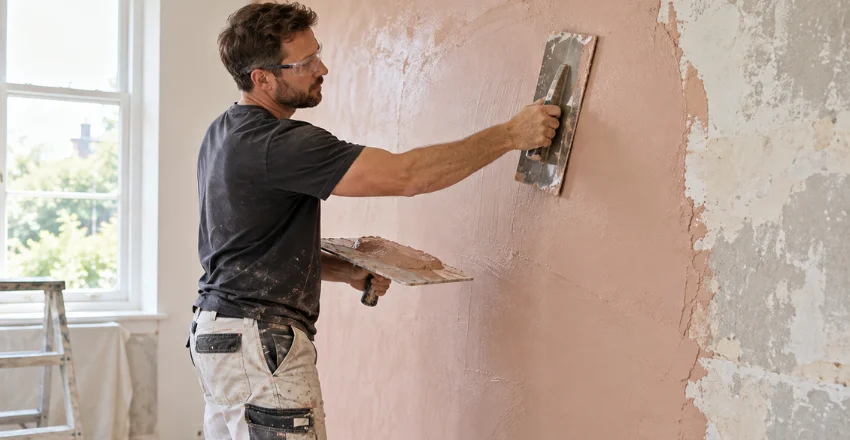
Load a manageable amount onto the hawk and pick up plaster with the trowel. Spread it across the wall with controlled overlapping strokes and consistent pressure. Concentrate on even coverage instead of trying to polish the surface immediately. Keep the trowel slightly angled while laying material onto the wall. Reduce the angle as you complete each stroke to flatten the plaster.
Work methodically so one section does not harden long before the neighboring area. Current UK guides from Which? and Wickes both describe a two-coat finishing process. They also emphasize flattening the first application before adding a thinner second coat.
7. Apply the Second Coat and Flatten It
Let the first coat firm sufficiently without allowing it to dry completely. Apply a thinner second coat using the same controlled technique. Fill low areas while keeping the entire face as level as possible. Return with a clean trowel as the surface begins to firm. Remove ridges and close small imperfections using smooth passes and light, consistent pressure.
A small amount of clean water can help during later trowelling stages when appropriate. Do not keep polishing a surface that has become too firm to respond cleanly. Excessive late trowelling can make the job harder rather than better. Correct timing is one reason plastering often takes practice before results become consistent.
8. Let the Wall Dry Naturally
Leave new plaster to dry before applying primer, paint, or wallpaper. Drying speed changes with coat thickness, background suction, room temperature, humidity, and ventilation. The surface usually lightens noticeably as moisture leaves it. Avoid forcing rapid drying with intense heat. Strong heating can create uneven drying conditions and may contribute to cracking.
Gentle ventilation and normal indoor temperatures provide a safer approach. This advises that fresh plaster may need at least five days in favourable summer conditions. It can take two weeks or longer in less favourable conditions. Wait until the entire wall is consistently dry before decorating.
What Does Replastering Cost in the UK?
DIY cost depends mainly on which tools you already own. Buying a hawk, good trowel, mixer, protection, primer, and plaster increases the first project’s cost. Later jobs become cheaper because most tools can be reused. Professional prices vary by location, wall condition, access, preparation, and the amount of failed plaster. Checkatrade’s February 2026 guide lists the average cost of skim plastering at about £24 per square meter.
Its full-room examples start considerably higher because labor and preparation cover several surfaces. Get written quotations for extensive or difficult work rather than relying on a national average. Ask whether stripping, waste removal, materials, beads, repairs, and final skimming are included. This makes quotations easier to compare on an equal basis.
Common Mistakes That Spoil New Plaster
Poor preparation causes many failures before the trowel touches fresh plaster. Leaving hollow material behind gives the new surface an unreliable foundation. Skimming over active damp can also hide the real defect rather than solve it. Mixing too much plaster creates another common problem. The material keeps setting while you work, so an oversized batch can become difficult before you reach the final section.
Smaller manageable batches give inexperienced DIYers more control. Dirty tools can scratch a surface that was otherwise becoming smooth. Keep a water bucket nearby and clean edges throughout the job. Good tool hygiene also helps stop hardened fragments from contaminating later mixes.
Preparing Fresh Plaster for Paint
Wait until the plaster is dry throughout before applying a coating. Painting a wall while moisture remains can cause adhesion problems and an uneven finish. Follow the paint manufacturer’s instructions for new plaster preparation. Many UK decorators use a suitable mist coat or dedicated new-plaster primer before the decorative coats. The correct product depends on the paint system you intend to use.
Do not assume every emulsion should be diluted in the same ratio. If you plan to redecorate the whole room, consider colour, lighting, furniture, and wall finishes together. DecoHome’s room decor ideas for UK homes can help you plan the finished space. Its paint sprayer buying guide also explains when spraying makes sense for larger decorating projects.
When Should You Call a Professional Plasterer?
A small practice wall can be a realistic project for a confident DIYer. Large visible walls demand faster application and more consistent trowel control. Ceilings add physical difficulty and are less forgiving when the finish starts setting. A professional assessment is also sensible if the wall has widespread damp, bulging plaster, repeated cracking, or an uncertain background. Resolve mould and moisture causes before covering affected surfaces.
DecoHome’s guide to dealing with mould on walls covers common moisture-related warning signs. Routine repairs and maintenance normally do not require building regulations approval in England. Work affecting structural elements, electrics, insulation, or certain other systems can change that position. Scotland, Wales, and Northern Ireland have separate regulatory arrangements, so check the rules applying to your property.
Frequently Asked Questions
Can a beginner replaster a wall?
Yes, a beginner can attempt a small and straightforward wall with careful preparation. The hardest part is judging when the plaster is ready for each finishing stage. Practising on a less visible area can reduce pressure while you learn the technique.
Can you plaster over old plaster?
You can plaster over old material when it remains firm, stable, clean, and suitably prepared. Loose or hollow sections need removal before a new finish is applied. The remaining surface also needs the correct suction control or bonding treatment.
How long does fresh plaster take to dry?
Drying can take several days and sometimes much longer. Temperature, ventilation, humidity, coat thickness, and the underlying wall all affect the result. Judge the whole surface rather than relying on a fixed number of days.
Do you need PVA before plastering?
PVA is used in many traditional DIY methods, but it is not universal. Some backgrounds or plaster systems require a proprietary bonding agent or grit primer instead. Always follow the plaster manufacturer’s instructions for the surface you are covering.
How do you know when full replastering is necessary?
Large hollow areas, crumbling material, bulging surfaces, and extensive detachment are strong warning signs. Small stable defects can usually be repaired without stripping an entire wall. Persistent moisture damage should be diagnosed before any replacement finish is installed.
What is the main secret to learning how to replaster a wall?
Preparation and timing matter as much as your trowel technique. Start with a stable background and keep every tool clean throughout the job. Then work in manageable areas so the plaster does not set before you can flatten it.
Your Next Step
Inspect the wall before buying materials and decide how much plaster genuinely needs removing. Fix leaks, damp, loose boards, or unstable backgrounds before covering them. A sound base gives your new finish a far better chance of remaining flat and crack-free. For a first attempt, choose a manageable wall rather than the largest surface in your home.
Gather every tool before mixing and follow the plaster manufacturer’s instructions closely. If extensive damage or moisture is present, get a plasterer to assess the wall before work begins.